


So, the left is what we start with and the right is what we're gonna end up with. If you want, you can download my original image here and follow these steps to practice.
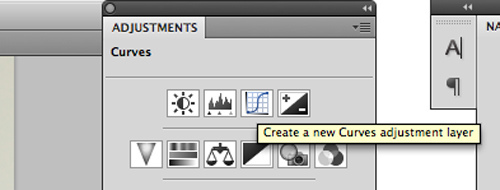
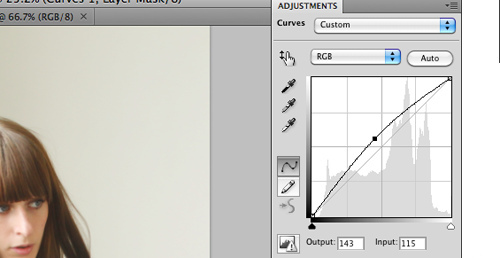
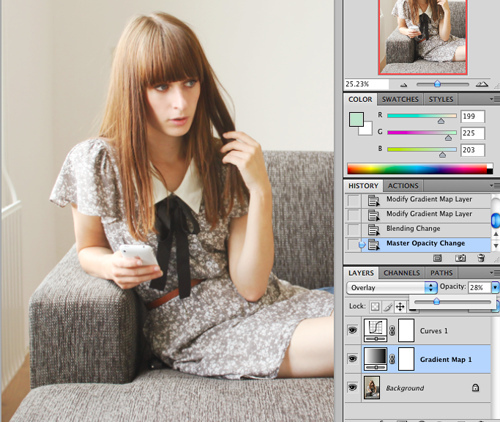
I always start by making a curves layer. I always have the Adjustments-panel right there, but you can also create a curves layer by going to Layer > New Adjustment Layer > Curves. We're gonna lighten the photo up a bit by dragging the curve up in the middle. You should play with this a bit to see what works best for the photo you're editing. I make sure I don't overexpose my photo's when I take them, cause it looks better to make a darkish photo lighter in Photoshop, than to make a light photo darker.
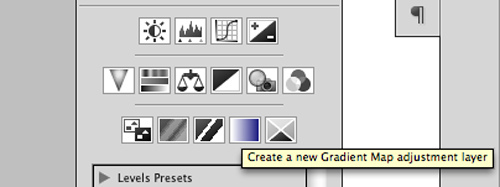

Now we're gonna make a gradient layer. I always make mine in pink tones for a summery effect or blueish for a colder effect. Again, play with this a bit. Of course we don't want our photo to be all pink, so we're gonna do the following:
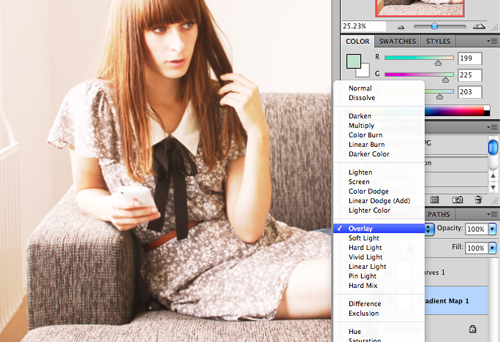
We're gonna set the layer style to overlay. This is gonna create a hideous '90s effect, but don't worry, we're gonna tone it down a bit by setting the opacity of the layer to somewhere around 25-30%, and then it'll look like this:
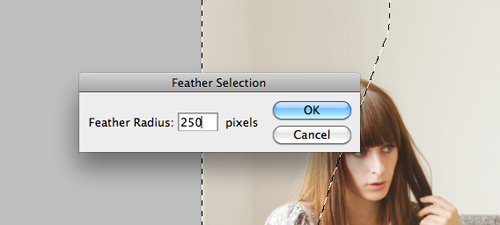
Almost there! Now we're gonna select the part where the light is coming from. In this picture it's the upper left side. Select that part and feather it (Select > Modify > Feather).
Then we'll turn that selection into another one of those lovely pink gradient layers. You'll do the same as before, but not as an Overlay, you set the opacity of the layer to whatever you think looks nice and natural. If all goes well, you'll end up with something like this:
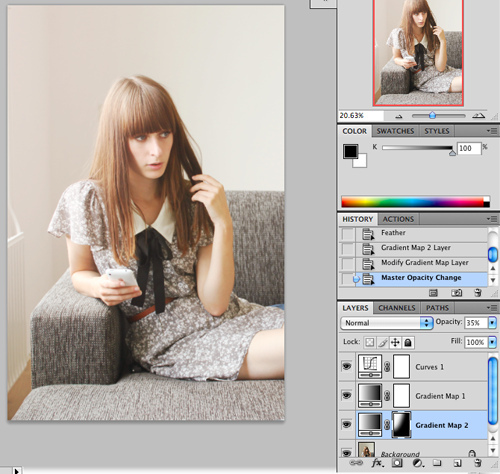
Aaand you're done!


23 comments:
I've never used Photoshop before but this looks like a great tutorial, thanks for sharing! And you look so lovely :)
CLASSY & FABULOUS
xoxo
love this photo! u always look so fresh and beautiful :)
xx
natalieoffduty.blogspot.com
this is really handy, thanks!
Fantastic post...I'll be trying out this tutorial on my next outfit post. Thanks so much :)
www.theheadlessmannequin.blogspot.com
thanks for sharing! i love your dress and you look lovely, as usual(:
http://www.twistchic.blogspot.com
Thankyou for sharing lovely, you look beautiful!
Eda ♥
So nice of you to share! But even nicer this tutorial is so simple and effective! Yay! Thanks!
I've always wished I had photoshop skills.
This is an excellent tutorial, thanks so much for the tips! I only have photoshop elements at the moment but it's amazing the difference it can make :) x
I have never seen your blog till today and now I am already lovin it <3
following!
thanks for the tutorial! i really love the effect you add on your photos. its a nice compliment to the lovely clothes you wear! i'll try this and hope its a success! thank you!
Amazing tutorial, thanks for sharing
http://www.etsy.com/shop/Rosabellebyvasu
thanks for this! I've tried it and it looks pretty well! will practice more :)
That's a fantastic tutorial! Such a dream like photo quality.
Thanks for the tips!
xo
Alexandra
THANK YOU!!! Oh my gosh what a helpful tutorial, I'm saving this under my favourites right now. I'm just a learner when it comes to photoshop and there's so much I don't understand but this has really helped a lot!! You explain so clearly :) Thank you so much, I'm so grateful!
What a great idea for a post, I love that you are not afraid of talking about your use of photoshop and showing how to do this.
It makes the fashion blogging world seem a bit more accessible xxx
Ahhh, thank you so much for this! I have to try this on my next photos. :) Have a great weekend!
www.stylocrat.blogspot.com
This is really helpful. Thank you. I am now following :)
http://seventhofjuly.blogspot.com/
This is so helpful! Thank you!
http://lidoffadaffodil.wordpress.com/
thankyou for sharing!
http://chachamisu.blogspot.com
waahhh, ,thank you for the tutorial!! i'll try this now! :)
Its a very easy tutorial to adjust the color and sharpness. But very helpful for all as such adjusting are mostly needed in doing editing in Photoshop.
Post a Comment